When the Air Selfie project, then at the crowdfunding campaign
on the Kickstarter platform, was unveiled, I was very cautious. Too small, without stabilization of his camera. The project was
funded, he fell behind as always, but it is now available for purchase. What
is it really worth? Here is the result of the tests. Note that this
device was given to us by the Bang good store. As usual, tell us if you think that practice has
influenced our judgment. Note that an
Airselfie2 is out, available in France. It's the same, exactly as this Air
Selfie.
Owner’s
tour
The Air Selfie surprises by its featherweight, 61 grams on
the scale with its battery. Anyway, there is no choice, we cannot remove it
is integrated and not removable. The device measures 6.8 x 9.5 x 10.6 cm. It's
slightly wider and thicker than a smartphone, and shorter. Impressive especially as the 6-blade
propellers are built into the hull, made of aluminum. They are animated by
brushless micromotors. At the front of the camera is the lens of his
camera. At the back is placed a micros connector. On the sides, they
are ventilation grilles. Under the Air, Selfie is housed the on / off
button, an IMU chip that combines a gyroscope and an altimetry barometer, and a
vertical camera.
Before taking off?
The Air Selfie must be recharged via the micros connector. It
only takes one USB port that delivers at least 2A for the load to be
operational. It takes about 25 minutes for a full charge. The version
I tested comes with a portable battery, type "Power Bank". It
has an external micros connector, but it also allows you to host the entire Air
Selfie! Once slid inside, the charge starts automatically.
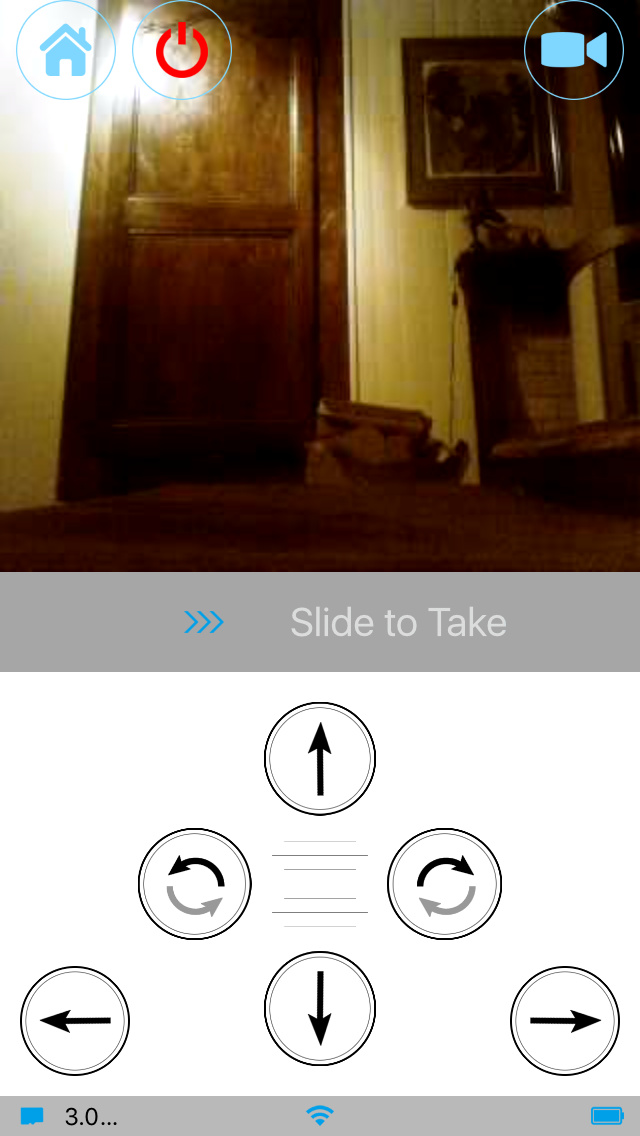
The settings
Long
press on/off button to turn on the Air Selfie. It emits a triple beep -
in the absence of a diode, it is the only way to know that it is on. It
appears in the list of wife access points. Once connected, launch Air
Selfie. The top-right icon allows you to calibrate, select photo settings,
determine control jitteriness, and get a summary of component versions. The
settings of the camera? Let's say they are sketchy: you can determine a
delay before the triggering of a photo and take several snapshots. That's
all. Back to the main menu which gives access to 3 driving modes and the
photo and video gallery.
Selfie Beginner mode
Why selfie? Because the camera
is flying with the camera facing you. Why beginner? Because orders
are given by pressing virtual keys on the screen. The interface is presented
vertically, and the video return compressed in a square that tightens the image. It's
not really nice. The latency is high, and the number of images per second
displayed on the smartphone screen is low. An icon makes it possible to
start the recording of a video, another one cuts the engines in
urgency. To take a picture? No icon, just touch the image.
What should be done?
The principle of taking off the Air Selfie is
to launch it by hand! Very slowly, to make him leave the palm of the hand. Astonishing,
but it works pretty well, it detects the absence of the hand and stays in the
air. Finally.it stays more or less in the air. Because maintaining
the altitude, with the help of the barometer altimetry, is not really
effective, it's the least I can say! The Air Selfie goes down a good
meter, sometimes more, and goes back up. But not always. In this
case, it's up to you to push the throttle.
So this mode "Selfie Beginner"?
It
allows you to go up, down, turn right, turn left, rotate right, turn left. But
to move forward and back? It's not planned. As the stationary is
non-existent, this absence is synonymous with a crash in the minute after
take-off! The Air Selfie does not always stop during a crash, it is up to
you to cut the engines with the virtual key. This first flight is very
disappointing! Switch to "airSelfie Motion Control" mode. The
presentation is the same, but the interface shows a virtual pad with 4 keys:
up, down, right rotation left rotation. For advance, recoil, slide right
and left, you have to press the screen and tilt the smartphone. Automated
stationery is still inefficient, but driving is a little easier.
No comments:
Post a Comment